Backup and Restore Linux With Timeshift
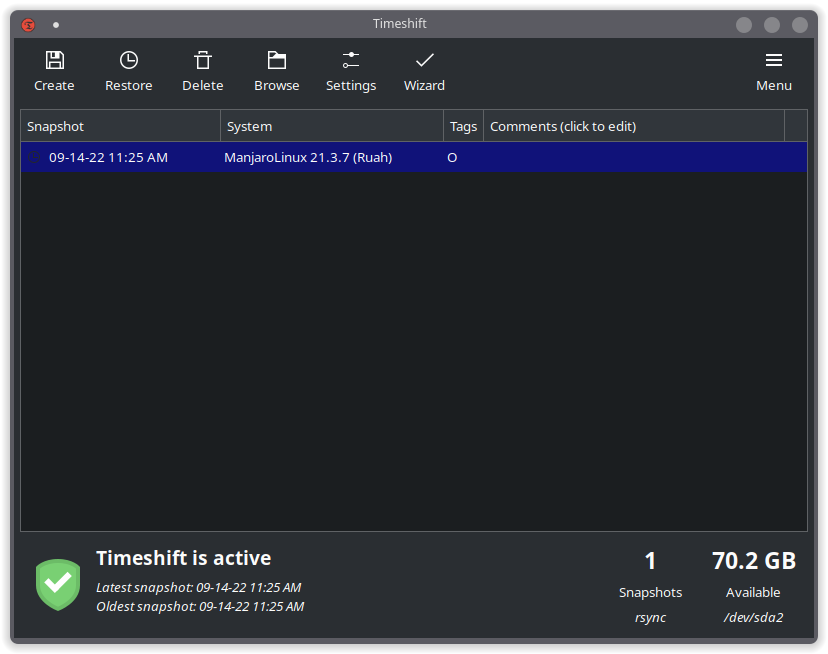
Timeshift is a backup utility for linux that allows you to create system snapshots to restore your system to a previously working state. It functions similar to System Restore in Windows and the Time Machine tool in Mac OS.
If you’re someone that likes to tinker with your system or you run a rolling release linux distribution like Arch Linux, then Timeshift is a must have backup application. When used properly, timeshift will ensure that you can restore your system from a user misconfiguration or a faulty system update.
Installing Timeshift
Timeshift is available for most linux distributions from their default graphical package manager. You can also install it from the command-line with the following commands.
For Ubuntu 20.04 and up:
sudo apt install timeshiftFor Ubuntu 18.04 you need to also add the ppa:
sudo apt-add-repository -y ppa:teejee2008/ppa
sudo apt update
sudo apt install timeshift
For Fedora, CentOS, and RHEL:
sudo dnf install timeshiftFor Arch and derivatives:
yay -S timeshiftFor Manjaro it’s available in official repositories:
sudo pacman -S timeshiftNow that you have Timeshift installed, let’s take a look at how to backup and restore linux with Timeshift.
Configure Timeshift
Timeshift is simple to configure since it comes with a setup wizard that walks you through the setup. In most cases you’ll be using rsync which only backs-up changed files. It does this using a hard-link method. This makes timeshift very space efficient. Btrfs will only be used on linux distributions that use the btrfs file system.
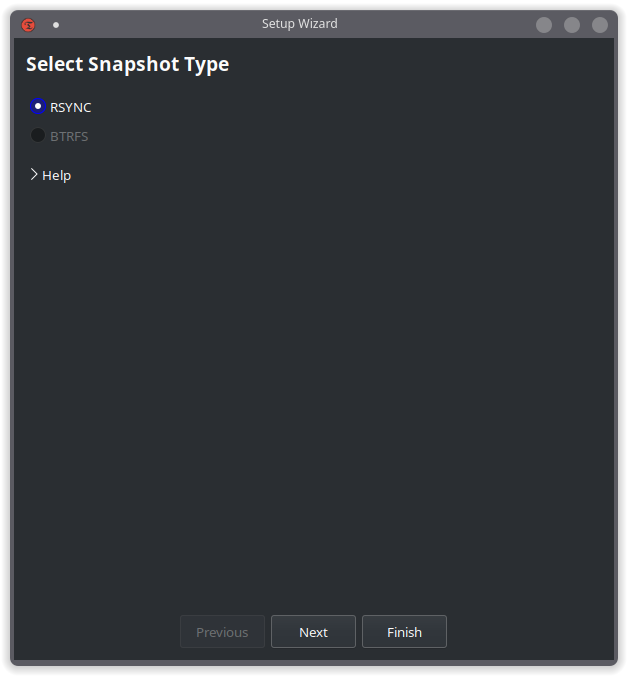
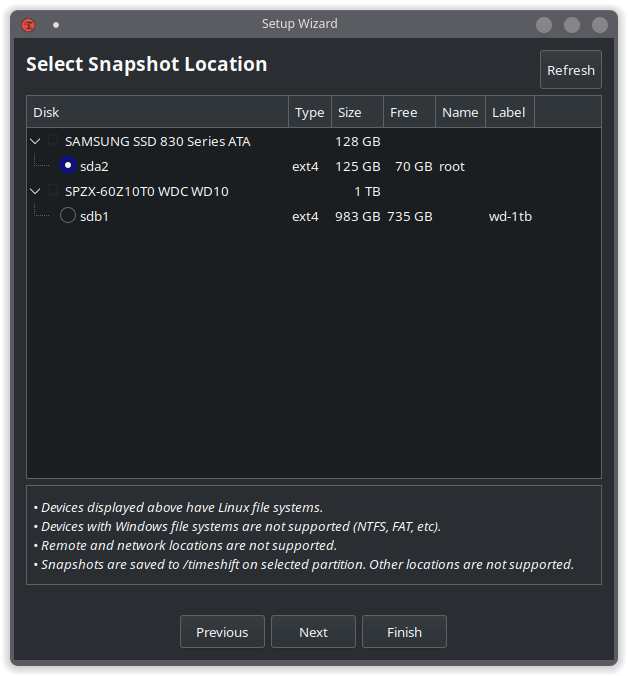
Now you will choose where to create the snapshot. It is recommended to use an external non-system partition for a full proof snapshot. This way if your system partition becomes corrupt you can still restore it from a live cd. Personally, I keep my snapshots on my system partition since I don’t tinker much with my system anymore.
You can always go back and change settings by running the wizard again or by going into the settings menu.
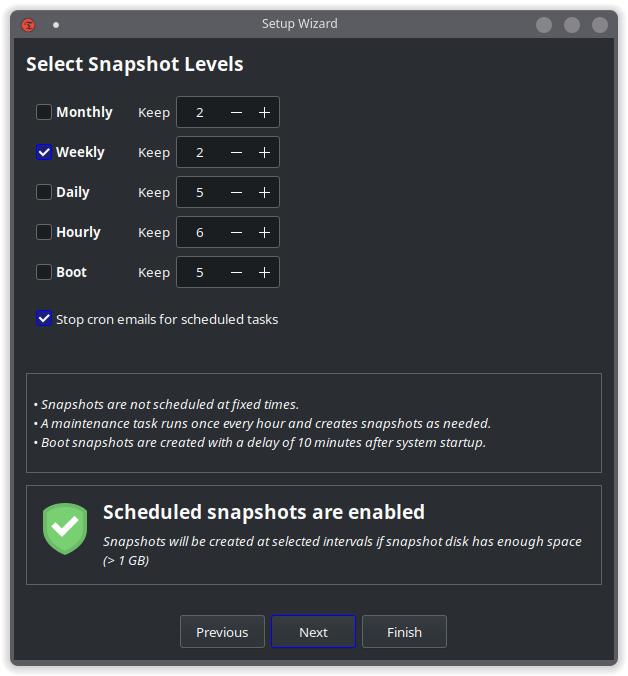
Next you can choose a schedule for your snapshots or no schedule at all. I opted to disable scheduled snapshots since I prefer to do manual snapshots right before a system update or any customization I may do.
If you choose to do scheduled snapshots, generally for most users a monthly snapshot while keeping 2 previous snapshots should be adequate.
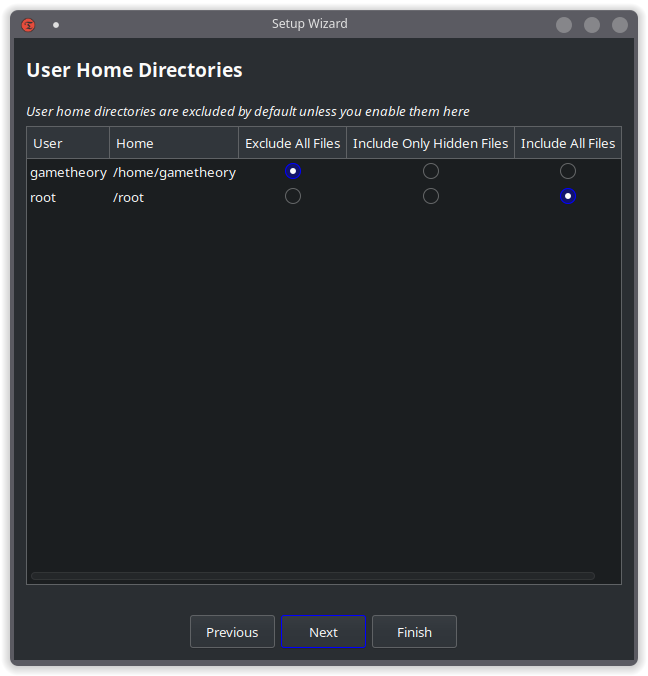
Finally you will choose which files to backup. By default, the home directory where user data resides is not included and not recommended. This way if you restore a previous snapshot it will not overwrite any of your personal files and user settings.
Timeshift Snapshots
Once you’ve configured Timeshift you can start creating snapshots. On the main screen you simply click on the “Create” button and a manual snapshot will be created.
To restore a snapshot from within linux, just open Timeshift and select the snapshot you wish to restore and click the “Restore” button and timeshift will do the rest.
To restore a snapshot from a system that does not boot, run a live usb and install timeshift in the live environment to restore your snapshot.
Note: You can also delete snapshots you no longer need at any time by selecting the snapshot and clicking the “Delete” button.
Bonus
If you would like to see the size of each individual timeshift snapshot including the total size of all timeshift snapshots combined, run the following command in a terminal.
sudo du -sch /timeshift/snapshots/*Adjust the command to reflect the path of your timeshift installation. By default timeshift creates its snapshots in the root directory “/timeshift” unless you chose a different partition during the setup.
Conclusion
A system backup and restore utility like Timeshift is a must have on any operating system. This will allow you to customize and tinker with your system without much worry. It will also save your system from a faulty update. You can learn more about Timeshift from their official repo page.
Tags: tutorials, linux