Android WebView


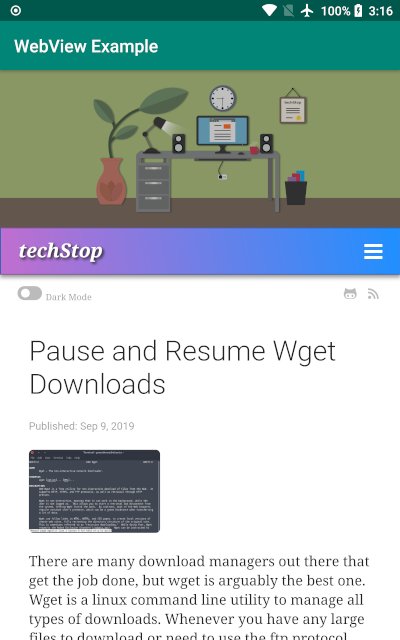
The Android WebView allows your app to open web pages within your app. For this Android WebView example we will create an android webview app that loads a couple web pages. We will be adding some attributes like JavaScript to interact with page elements and a DownloadListener for downloading items from download links on web pages as well as a ProgressBar to show page loading progress. We will also request runtime storage write permissions for our DownloadListener for android 6+.
The code in this tutorial will be in the full project on github linked at the bottom of this page. Feel free to fork or download the project from github.
Summary:
- We will create a new class with our webview that we can pass any web page URL to.
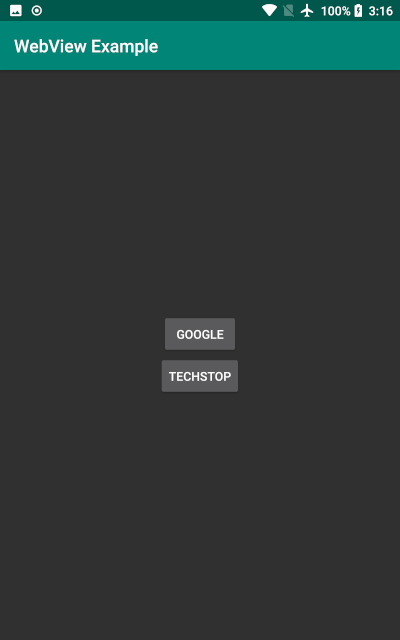
- In our MainActivity we create two buttons that will each pass a different web page URL to our webview.
- In our WebView class we will add a DowloadListener, ProgressBar, and request storage write permission.
Android WebView Example
Begin by creating a new project in Android Studio with an Empty Activity if you haven’t already. We can call the project “WebView Example”.
Now create a new java class called “MyWebView” where we will setup our webview. I’ve included comments in the code so that you know what each attribute and method is for.
MyWebView.java
package com.webviewexample;

import android.Manifest;
import android.annotation.SuppressLint;
import android.app.DownloadManager;
import android.content.pm.PackageManager;
import android.graphics.Bitmap;
import android.net.Uri;
import android.os.Build;
import android.os.Bundle;
import android.os.Environment;
import android.view.View;
import android.webkit.CookieManager;
import android.webkit.URLUtil;
import android.webkit.WebView;
import android.webkit.WebViewClient;
import android.widget.ProgressBar;
import android.widget.Toast;

import androidx.annotation.NonNull;
import androidx.appcompat.app.AppCompatActivity;
import androidx.core.app.ActivityCompat;


public class MyWebView extends AppCompatActivity {
  // Declare our web view.
  private WebView webview;

  // We can pass URLs from any other class to this string.
  static String url;

  // Optional progress bar for page loading progress.
  private ProgressBar progress;

  // A request code for our storage write request.
  private static final int WRITE_STORAGE = 1;

  @SuppressLint("SetJavaScriptEnabled")
  @Override
  protected void onCreate(Bundle savedInstanceState) {
    super.onCreate(savedInstanceState);
    setContentView(R.layout.activity_webview);

    // Optional progress bar for page loading progress.
    progress = findViewById(R.id.progressBar);

    // Attach our web view to our layout.
    webview = findViewById(R.id.webView);
    // Needed to interact with elements on most web pages.
    webview.getSettings().setJavaScriptEnabled(true);
    // This enables pinch to zoom.
    webview.getSettings().setBuiltInZoomControls(true);
    // Do not display the zoom controls on the screen.
    webview.getSettings().setDisplayZoomControls(false);
    // Loads a page to fit in the screen (zoomed out).
    webview.getSettings().setLoadWithOverviewMode(true);
    // Do not constrain the viewport to the web view dimensions.
    webview.getSettings().setUseWideViewPort(true);
    // Allow website user settings to be saved and retrieved.
    webview.getSettings().setDomStorageEnabled(true);
    // Attach our web view to our WebViewClient.
    webview.setWebViewClient(new MyWebViewClient());
    // We call our url string variable to load.
    webview.loadUrl(url);

    // Adds a DownloadListener to our web view. This allows us to click on
    // download links and have items download to our downloads directory.
    webview.setDownloadListener((url, userAgent, contentDisposition, mimetype, contentLength) -> {
      String fileName = URLUtil.guessFileName(url, contentDisposition, null);
      String cookie = CookieManager.getInstance().getCookie(url);
      DownloadManager dm = (DownloadManager) getSystemService(DOWNLOAD_SERVICE);
      DownloadManager.Request request = new DownloadManager.Request(Uri.parse(url));
      request.setAllowedNetworkTypes(DownloadManager.Request.NETWORK_WIFI | DownloadManager.Request.NETWORK_MOBILE);
      request.setAllowedOverRoaming(false);
      request.allowScanningByMediaScanner();
      request.setDestinationInExternalPublicDir(Environment.DIRECTORY_DOWNLOADS, fileName);
      request.addRequestHeader("Cookie", cookie);
      request.setNotificationVisibility(DownloadManager.Request.VISIBILITY_VISIBLE_NOTIFY_COMPLETED);
      // Check for storage write permission before attempting to download.
      if (getPermission() && dm != null) {
        dm.enqueue(request);
      }
    });

  }

  // Check if storage write permission has been granted. If not, request it.
  private boolean getPermission() {
    if (Build.VERSION.SDK_INT >= 23) {
      if (ActivityCompat.checkSelfPermission(this, Manifest.permission.WRITE_EXTERNAL_STORAGE) == PackageManager.PERMISSION_GRANTED) {
        // True if permission granted exists.
        return true;
      } else {
        // We ask for storage write permission if it doesn't exist.
        ActivityCompat.requestPermissions(this, new String[]{Manifest.permission.WRITE_EXTERNAL_STORAGE}, WRITE_STORAGE);
        return false;
      }
    } else {
      // True for SDK < 23
      return true;
    }
  }

  // Check if user granted or denied storage write permission when requested and
  // run code for either situation. This method is optional, but useful.
  @Override
  public void onRequestPermissionsResult(int requestCode, @NonNull String[] permissions, @NonNull int[] grantResults) {
    super.onRequestPermissionsResult(requestCode, permissions, grantResults);
    if (requestCode == WRITE_STORAGE) {
      if (grantResults.length > 0 && grantResults[0] == PackageManager.PERMISSION_GRANTED) {
        Toast.makeText(getApplicationContext(), "Permission Granted. Try download again.", Toast.LENGTH_LONG).show();
      } else {
        Toast.makeText(getApplicationContext(), "Permission Denied! Cannot Download.", Toast.LENGTH_LONG).show();
      }
    }
  }

  // Attach our web view to our WebViewClient.
  private class MyWebViewClient extends WebViewClient {
    // This method makes sure that any links we click will open within
    // our app instead of launching in the default web browser.
    @Override
    public boolean shouldOverrideUrlLoading(WebView view, String url) {
      return super.shouldOverrideUrlLoading(view, url);
    }

    // Since this method is called every time a new page starts to load, it's
    // perfect to run our Progress Bar.
    @Override
    public void onPageStarted(WebView view, String url, Bitmap favicon) {
      progress.setVisibility(View.VISIBLE);
      super.onPageStarted(view, url, favicon);
    }

    // Called whenever a page has finished loading. Here we can end our
    // page loading progress bar and take it out of view.
    @Override
    public void onPageFinished(WebView view, String url) {
      progress.setVisibility(View.GONE);
      super.onPageFinished(view, url);
    }

  }

  // If we have clicked through multiple pages, this allows the back button
  // to take us back through each page.
  @Override
  public void onBackPressed() {
    if (webview.canGoBack()) {
      webview.goBack();
    } else {
      super.onBackPressed();
    }
  }
}
Create a new layout resource file for our WebView called “activity_webview.xml”.
activity_webview.xml
<?xml version="1.0" encoding="utf-8"?>
<RelativeLayout xmlns:android="http://schemas.android.com/apk/res/android"
  android:layout_width="match_parent"
  android:layout_height="match_parent">

  <WebView
    android:id="@+id/webView"
    android:layout_width="match_parent"
    android:layout_height="match_parent" />

  <ProgressBar
      android:id="@+id/progressBar"
      style="?android:attr/progressBarStyleHorizontal"
      android:layout_width="match_parent"
      android:layout_height="wrap_content"
      android:indeterminateTint="?attr/colorAccent"
      android:indeterminate="true" />
</RelativeLayout>
Now we setup our Buttons with the URLs in the MainActivity class…
MainActivity.java
package com.webviewexample;

import androidx.appcompat.app.AppCompatActivity;

import android.content.Intent;
import android.os.Bundle;
import android.widget.Button;

public class MainActivity extends AppCompatActivity {
  @Override
  protected void onCreate(Bundle savedInstanceState) {
    super.onCreate(savedInstanceState);
    setContentView(R.layout.activity_main);

    // This button will pass the Google website url to MyWebView.class
    Button gbtn = findViewById(R.id.googleButton);
    gbtn.setOnClickListener(view -> {
      MyWebView.url = "https://www.google.com/";
      Intent intent = new Intent(MainActivity.this, MyWebView.class);
      startActivity(intent);
    });

    // This button will pass the techStop website url to MyWebView.class
    Button tsbtn = findViewById(R.id.tsButton);
    tsbtn.setOnClickListener(view -> {
      MyWebView.url = "https://techstop.github.io/";
      Intent intent = new Intent(MainActivity.this, MyWebView.class);
      startActivity(intent);
    });
  }
}
We now need to add the buttons to the MainActivity layout…
activity_main.xml
<?xml version="1.0" encoding="utf-8"?>
<LinearLayout xmlns:android="http://schemas.android.com/apk/res/android"
  xmlns:tools="http://schemas.android.com/tools"
  android:layout_width="match_parent"
  android:layout_height="match_parent"
  android:gravity="center"
  android:orientation="vertical"
  tools:context=".MainActivity">

  <Button
    android:layout_width="wrap_content"
    android:layout_height="wrap_content"
    android:id="@+id/googleButton"
    android:text="@string/google" />

  <Button
    android:layout_width="wrap_content"
    android:layout_height="wrap_content"
    android:id="@+id/tsButton"
    android:text="@string/tech_Stop" />
</LinearLayout>
We’re almost done! Lets add the strings we need…
strings.xml
<resources>
  <string name="app_name">WebView Example</string>
  <string name="google">GOOGLE</string>
  <string name="tech_Stop">techStop</string>
</resources>
Finally we add MyWebView activity and necessary permissions to the Android Manifest.
AndroidManifest.xml
<?xml version="1.0" encoding="utf-8"?>
<manifest xmlns:android="http://schemas.android.com/apk/res/android"
    xmlns:tools="http://schemas.android.com/tools"
    package="com.webviewexample">

    <uses-permission android:name="android.permission.INTERNET" />
    <uses-permission android:name="android.permission.ACCESS_NETWORK_STATE" />
    <uses-permission android:name="android.permission.WRITE_EXTERNAL_STORAGE"
        tools:ignore="ScopedStorage" />
    <uses-permission android:name="android.permission.ACCESS_DOWNLOAD_MANAGER" />

    <application
        android:allowBackup="true"
        android:icon="@mipmap/ic_launcher"
        android:label="@string/app_name"
        android:roundIcon="@mipmap/ic_launcher_round"
        android:theme="@style/AppTheme">
        <activity android:name=".MainActivity"
            android:exported="true">
            <intent-filter>
                <action android:name="android.intent.action.MAIN" />

                <category android:name="android.intent.category.LAUNCHER" />
            </intent-filter>
        </activity>
        <activity android:name=".MyWebView" />
    </application>
</manifest>
This will conclude the Android WebView tutorial. The full project is on github. You can download or fork it from the link below and import it to your favorite IDE, though Android Studio is recommended.
Tags: android studio, app development, java, tutorials, android